Now that we actually have a proper Mac app up and running, let’s delve into making a user interface!
Making a window
First, we’ll need a window.
We want this window to open on startup,
so let’s implement the applicationDidFinishLaunching(_:) app delegate method:
// main.swift

import AppKit

let _ = NSApplication.shared
let appDelegate = AppDelegate()
NSApp.delegate = appDelegate
NSApp.run()

class AppDelegate: NSObject, NSApplicationDelegate {
	var window: NSWindow! = nil

	func applicationDidFinishLaunching(_ notification: Notification) {
		window = NSWindow(
			contentRect: .init(x: 0, y: 0, width: 200, height: 100),
			styleMask: [.titled, .closable, .miniaturizable, .resizable],
			backing: .buffered,
			defer: true,
		)
		window.makeKeyAndOrderFront(nil)
	}
}
That might look a bit intimidating at first,
but I promise it isn’t that bad!
contentRect specifies the position and size of
the window’s content area on the display,
styleMask lets us say that the window has all the usual behaviors,
and the other two arguments are closer to historical cruft than anything else.
makeKeyAndOrderFront(_:) makes the window “key”
(the key window is the window that receives keyboard events)
and, well, brings it to the front.
Simple enough!
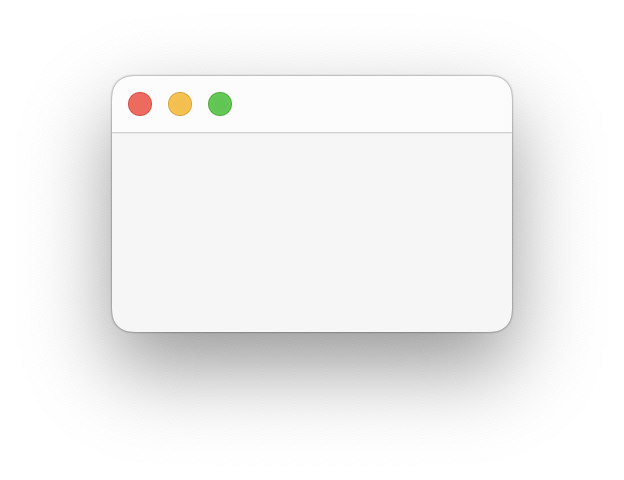
Compile and run, and you’ll see a tiny blank window appear in the bottom right corner of your screen.

Try closing the window, though, and you’ll see that there’s no way to get it back. The standard behavior for Mac apps is that their default windows reappear when the user does anything that would usually launch the app – that could entail clicking on its icon in the Dock, double-clicking it in the Finder, or opening it from Spotlight. Thankfully, there’s an app delegate method that is called when the user performs one of these actions, but only if the app has no existing windows:
class AppDelegate: NSObject, NSApplicationDelegate {
	lazy var window = {
		let w = NSWindow(
			contentRect: .init(x: 0, y: 0, width: 200, height: 100),
			styleMask: [.titled, .closable, .miniaturizable, .resizable],
			backing: .buffered,
			defer: true,
		)
		w.isReleasedWhenClosed = false
		return w
	}()

	func applicationOpenUntitledFile(_ sender: NSApplication) -> Bool {
		window.makeKeyAndOrderFront(nil)
		return true
	}
}
As a rule of thumb, you should never show your windows in
applicationDidFinishLaunching(_:).
You’ll see that I’ve extracted the creation of the window
from the code that actually makes the window appear on screen
into the now-lazy property’s initializer.
This way the window is only ever created once.
Notice how the window maintains its position
if you close it and then open it again.
One little hiccup here is that we need to set isReleasedWhenClosed to false.
By default, windows release themselves when they’re closed.
Yes, this is very strange.
And yes, if you remove this line you’ll see the app crashes
the moment you try to reopen the window.
There’s a few final touches I think we should cover before moving on. First, when Mac apps display a window for the first time, that window is typically centered. (One exception to this is windows part of a sequence; think document windows, terminals, that sort of thing.) Currently our window appears in the bottom right, which feels … odd.
class AppDelegate: NSObject, NSApplicationDelegate {
    lazy var window = {
        let w = NSWindow(
            // snip
        )
        w.isReleasedWhenClosed = false
        w.center() // new
        return w
    }()

    // snip
}
Done! Second, one of the central tenets of the Mac’s interface is stability. If the user changes the size or position of a window, that window should stay there, forever, even across app launches. Again, there’s an easy built-in way to accomplish this:
class AppDelegate: NSObject, NSApplicationDelegate {
	lazy var window = {
		let w = NSWindow(
			// snip
		)
		w.isReleasedWhenClosed = false
		w.center()
		w.setFrameAutosaveName("MainWindow") // new
		return w
	}()

	// snip
}
The call to setFrameAutosaveName(_:)
automatically restores the saved window size and position
(collectively referred to as the window frame).
As a result, we need to make sure we call center()
before setFrameAutosaveName(_:), not after,
lest we overwrite the window frame that was just restored.
Adding content to a window
Every window contains a hierarchy of views. Views are the fundamental UI primitive: buttons are a kind of view, text fields are a kind of view, tables are a kind of view, and so on. Let’s start really simple:
class AppDelegate: NSObject, NSApplicationDelegate {
	lazy var window = {
		let w = NSWindow(
			// snip
		)
		w.isReleasedWhenClosed = false

		let label = NSTextField(labelWithString: "Hi, Cocoa!")
		label.font = .systemFont(ofSize: 48, weight: .semibold)
		w.contentView = label

		w.center()
		w.setFrameAutosaveName("MainWindow")
		return w
	}()

	// snip
}
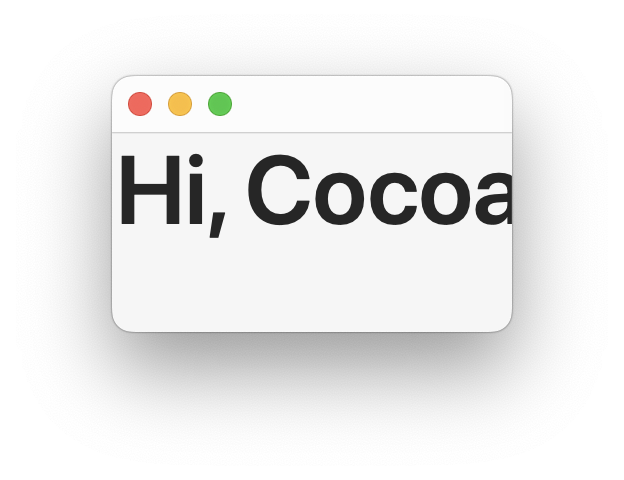
We create a new label (Cocoa represents labels as read-only text fields), set its font and use it as the window’s content view:

The best way to stop the label from being cut off is to use Auto Layout. Cocoa has extremely sophisticated (some would say too sophisticated) layout capabilities that let you express the intent of your layout to the framework. This means that even the most complex layouts can adapt to changing window sizes, content sizes, languages and writing directions.
Under Auto Layout, you create a number of layout constraints which the layout engine finds a solution for. A layout constraint is simply a linear equation: A op Multiplier × B + Constant where op is =, ≤ or ≥. More concretely, you might have a constraint like Window Width ≥ 1 × Label Width + 100. Combine a couple of these and you can express the layout of an entire interface.
For starters, we want the label to be centered in the window. Let’s create the constraints necessary to describe this:
class AppDelegate: NSObject, NSApplicationDelegate {
	lazy var window = {
		let w = NSWindow(
			// snip
		)
		w.isReleasedWhenClosed = false

		let label = NSTextField(labelWithString: "Hi, Cocoa!")
		label.font = .systemFont(ofSize: 48, weight: .semibold)

		// new
		label.translatesAutoresizingMaskIntoConstraints = false
		let contentView = w.contentView!
		contentView.addSubview(label)
		NSLayoutConstraint.activate([
			label.centerXAnchor.constraint(equalTo: contentView.centerXAnchor),
			label.centerYAnchor.constraint(equalTo: contentView.centerYAnchor),
		])

		w.center()
		w.setFrameAutosaveName("MainWindow")
		return w
	}()

	// snip
}
As before, this might look intimidating, but if you resist the urge to let your eyes glaze over you’ll find it’s actually quite straightforward.
First, we set this mysterious translatesAutoresizingMaskIntoConstraints
property on the label to false.
Despite the scary name, all this does is
tell the label to participate in Auto Layout.
Next, rather than replace the window’s content view outright like we did before,
we instead make the label a subview of the window’s content view.
Recall that views form a hierarchy.
Last is the actual constraints part:
we create and activate two constraints, one for each dimension, which say
the label’s center point must be equal to the content view’s center point.
Think back to the linear equations from before –
what we’ve created here is equivalent to the equations
Label Center x = 1 × Content View Center x + 0
and Label Center y = 1 × Content View Center y + 0.

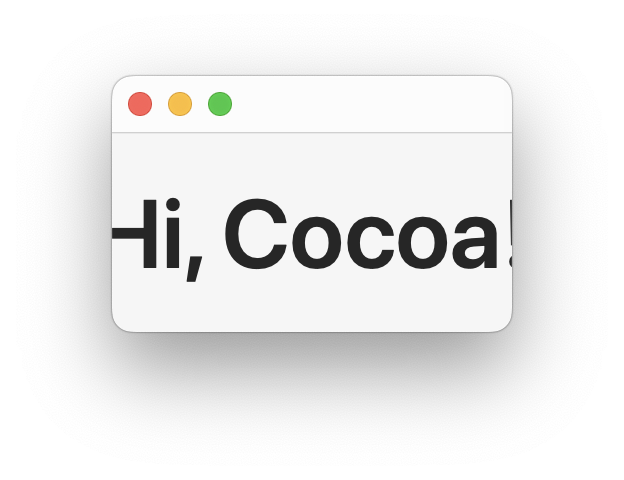
We’ve successfully centered the label, but those two constraints aren’t enough to keep the entire label visible. What sort of equation could we come up with that describes what we want? Well, I guess we want the left edge of the label to at least be a few points away from the window’s left edge, and the same for the top edge.
class AppDelegate: NSObject, NSApplicationDelegate {
	lazy var window = {
		// snip

		label.translatesAutoresizingMaskIntoConstraints = false
		let contentView = w.contentView!
		contentView.addSubview(label)
		NSLayoutConstraint.activate([
			label.centerXAnchor.constraint(equalTo: contentView.centerXAnchor),
			label.centerYAnchor.constraint(equalTo: contentView.centerYAnchor),
			// new:
			label.leftAnchor.constraint(greaterThanOrEqualTo: contentView.leftAnchor, constant: 30),
			label.topAnchor.constraint(greaterThanOrEqualTo: contentView.topAnchor, constant: 30),
		])

		// snip
	}()

	// snip
}
The constraints aren’t that different to the English word equations I gave above!
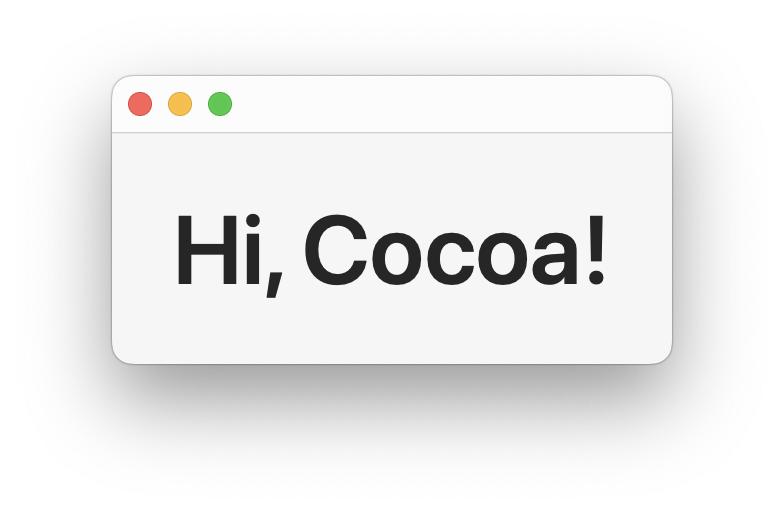
Try resizing the window and you’ll find that you can make it as large as you like and the label remains centered, but the window won’t let you make it any smaller than the size needed to fully display the label plus the 30 points of padding we specified. Notice how we didn’t need to constrain the right and bottom edges like we did the left and top edges, since the centering constraints mean all sides are already taken care of.

As a small aside, our constraints now
fully specify the minimum size the window can be,
so providing an explicit size in the NSWindow initializer is pointless.
We can remove it, relying on the layout engine to size the window for us:
class AppDelegate: NSObject, NSApplicationDelegate {
	lazy var window = {
		let w = NSWindow(
			contentRect: .zero, // new
			styleMask: [.titled, .closable, .miniaturizable, .resizable],
			backing: .buffered,
			defer: true,
		)
		w.isReleasedWhenClosed = false

		// snip
	}()

	// snip
}
Try resetting the window’s saved frame with
$ defaults delete org.xoria.blog.Counter "NSWindow Frame MainWindow"
and launch the app again.
You’ll see that our call to center() doesn’t seem to be working anymore!
The window’s top-left corner appears to be centered,
rather than the window’s actual center.
The problem here is that the layout engine runs its layout pass
at some point later on, long after we call center().
So, at the time center() is called
the window still has a width and height of zero points!
We’ll fix this by explicitly invoking the layout engine before calling center():
class AppDelegate: NSObject, NSApplicationDelegate {
	lazy var window = {
		let w = NSWindow(
			contentRect: .zero,
			styleMask: [.titled, .closable, .miniaturizable, .resizable],
			backing: .buffered,
			defer: true,
		)
		w.isReleasedWhenClosed = false

		// snip

		w.layoutIfNeeded() // new
		w.center()
		w.setFrameAutosaveName("MainWindow")
		return w
	}()

	// snip
}
This structure where we
- create a zero-sized window
- populate its content view and add constraints
- trigger a re-layout with
layoutIfNeeded() - center the window with
center() - and finally restore the autosaved window frame if one exists with
setFrameAutosaveName(_:)
is a useful pattern to keep in mind.
In the next installment we’ll explore Auto Layout further.
Luna Razzaghipour
12 May 2025